


#05 | Step-by-step guide to conditioning old and dried-out leather shoes and boots
The exact process I used to revive French Army Ranger Boots that spent over 60 years in storage
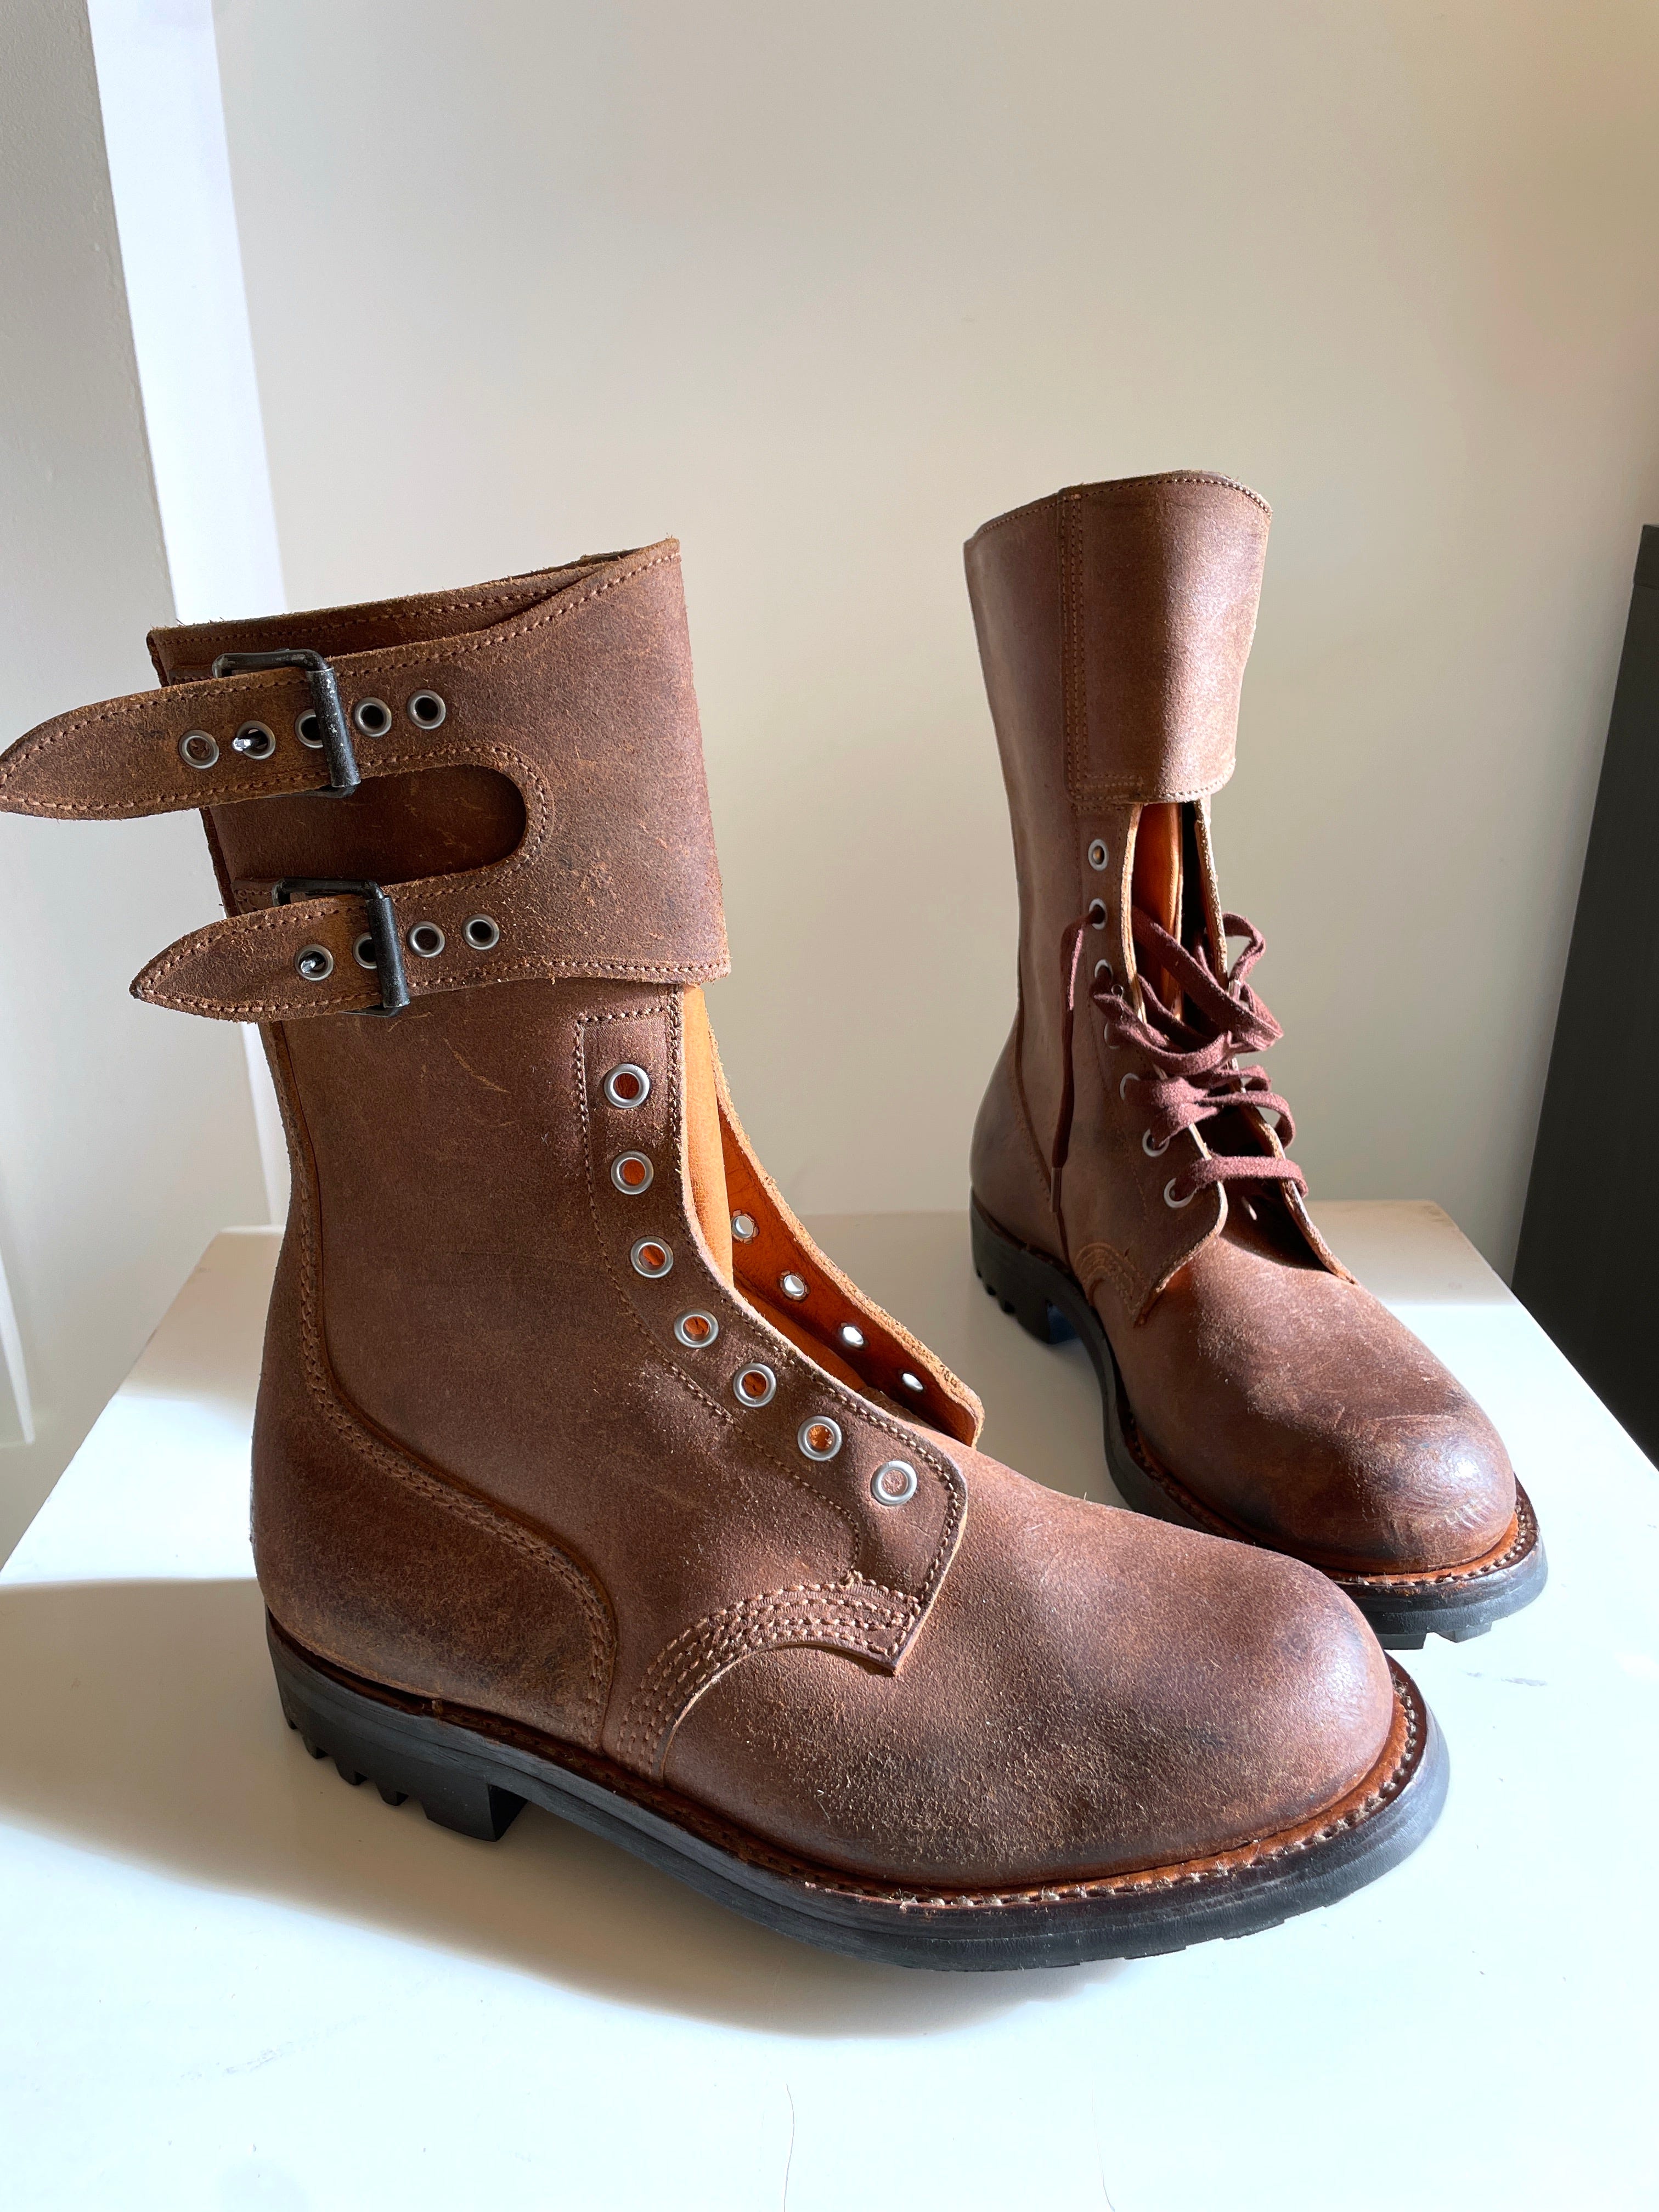
I recently scored deadstock M52 French Army Ranger Boots. Here they are fresh out the box:


To my knowledge, the French produced this model of roughout leather rangers between 1952 and 1965 or so, which means that my pair is at least 60 years old.
After decades in storage, the leather was exceptionally dry and stiff. It felt like a sheet of thin, hard plastic when pressed. This leather desperately needed conditioning, or it would crack with any serious wear.
Deciding on re-conditioning method
Normally, I use Bick 4 for all of my conditioning needs. That wouldn’t work here. For starters, Bick 4 is purpose-designed for smooth leathers, not roughout. But that wasn’t my main consideration.
I wanted to try an approach that didn’t rely on modern silicon- and synthetics-based conditioners.
Simply put, I wanted to use natural products on on this gorgeous antique leather. Thus, with some research, I came up with my own process.
Below you will find the exact re-conditioning protocol I used to bring this pair to life. I also included a few notes on fit and leather behavior of these specific boots after conditioning.
If you’re eyeing a pair of deadstock French Rangers (or any other heavily aged footwear) and have doubts whether you can restore them, please know that you can. This protocol will guarantee good results.
A word of caution, though: this re-conditioning protocol WILL darken the leather a little bit.
Okay, enough talking now. Here’s the protocol.
Things you need
Pure jojoba oil
Anhydrous lanolin
Milk oil
Optional: Squalane for deep hydration of stress points and welt. [Note: squalane doesn’t darken the leather.]
Optional [for waxed leathers only]: Emulsified beeswax to restore water repelling properties of waxed roughout. [Skip this if you need to re-condition smooth leather boots or shoes.]
Reconditioning protocol
DAY 1: Prep + Deep hydration with squalane
🟡 Optional prep:
Brush the roughout side with a stiff brush to remove dust and dried fibers. (Skip if working with smooth leather.)
Wipe the inside with a dry cloth to remove dust and an occasional spider web.
Inspect for mold. If needed, wipe with a 1:1 vinegar-water solution and let dry.
Check for cracking. If the leather is stiff but intact, proceed to spot hydration.
Note: My pair was in pristine condition, so I while I was prepared to do the above steps, I was pleasantly surprised that I didn’t need to.
💧 Squalane for deep hydration
Flex Points (Vamp & Throat Crease): Massage 1-2 drops per boot to prevents cracking in high-movement areas.
Welt Stitching Line: Lightly applied with a cotton bud or a brush to increase welt flexibility and minimize thread stress
Heel Counter (Inside & Outside): Rub-in 1-2 drops per boot to soften the hardened counters and prepare them for future hydration.
Inside Boot (Heel & Ball of Foot Area): 1-2 drops rubbed into dry spots
In total, I used about 3.5 ml of squalane per boot. Here’s how they looked after this step:


HOW SQUALANE WORKS:
SqualAne (with an “a”) is a hydrogenated form of squalEne (with an “e”). It’s is a natural triterpene, which is a class of hydrocarbons.
Squalane is an oily transparent liquid, and it’s often used in skincare products as a moisturizer and a penetrating carrier oil.
When applied to leather products, squalane mimics the lipids which leather loses over time. It also spreads easily and penetrates deeply into fibers which makes it as a fantastic primer before heavier products like mink oil or lanolin.
Note: Squalane ≠ squalene. Unlike raw squalene, which is highly unstable and oxidizes quickly, squalane is fully saturated. This makes it more resistant to oxidation and rancidity.
NEXT: ⏰ Let squalane absorb for 12-24 hours before proceeding to liquid conditioning.
DAY 2: Liquid conditioning (outside / roughout)
Once squalane is absorbed into the leather you can proceed to apply lighter oils.
🧴 Apply jojoba oil lightly over the roughout with a cloth, makeup sponge, or hands. Let it sit for 24 hours.
Here are the photos of the boots immediately after this step, and after 24h:


HOW JOJOBA OIL WORKS:
Despite the name, jojoba oil is not an oil. It’s a liquid wax. Specifically, it’s a wax ester made up of long-chain esters of fatty acids and alcohols.
Its molecular structure resembles natural sebum, which makes it highly compatible with leather.
Last but not least, jojoba is resistant to oxidation, which means it doesn’t go rancid like a more often used neatsfoot oil.
(Side note: I also use it to moisturize my beard skin 😅 )
NEXT: ⏰ Let jojoba oil absorb for 24 hours before proceeding to inside conditioning with heavier oils.
DAY 3: Heavy conditioning of the INSIDE
🧽 Apply a blend of mink oil + lanolin (3:1 ratio) with a cloth or a makeup sponge. Aim for a thin layer.
⚖️ Just to give you an idea about how little you need to apply: I used a total of 3 grams of mink oil and 1 gram of lanolin.
🔵 Skip this step if your boots or shoes are lined with fabric. (This should be obvious, but I need to be explicit.)
👉 Additionally, and if your lining is made from delicate top grain leather, you can skip heavy mink oil and lanolin and go for a light coat of jojoba oil instead.
Tip: use heat gun or hair drier to melt the oils for easier blending before applying.
NEXT: ⏰ Let absorb for 24 hours before proceeding to condition the outside.
DAY 4-5: Heavy conditioning of the OUTSIDE
💆♂️ Apply lanolin with bare hands (to melt it) and massage it into the fibers.
I was fairly generous in layering it on. A lot of lanolin got trapped in the fibers, and I had to apply more than expected.
If you’re working with smooth leather, you’ll need to be much more conservative at this step.
A customary photo of the boots after this step, and then a few days later:


HOW LANOLIN WORKS:
Lanolin is a complex, semi-occlusive wax derived from sheep’s wool.
It’s commonly used as an emollient, which in layman’s terms means that it prevents the leather from drying out by binding to leather fibers and forming a protective film on them.
Another benefit of lanolin is that it has anti-fungal and antibacterial properties, and in nature it protects sheep skin from from infections.
We can use that property to prevent leather deterioration in this pair of boots.
NEXT: ⏰ Lanolin absorbs slowly. You will need to wait ⚠️ at least 48 hours ⚠️ before proceeding to the next step.
DAY 6: Welt conditioning
Strictly speaking, you can do this on Day 4, but I chose to split this step into a separate day. It’s a bit easier to manage that way.
At this step, you should apply a conservative amount of mink oil along the welt. It’s best to use a brush or a cotton bud to make sure you don’t go overboard.
NEXT: ⏰ Let absorb overnight or for 12 hours.
DAY 7: Final Protection / Weatherproofing
These ranger boots were originally heavily waxed, but over time dried out. I needed to restore this coating, and opted to use Delara leather balm, which is made from natural beeswax emulsified with jojoba oil. It also includes natural anti-oxidants and preservatives, like Vitamin A.
You can use any similar product, just make sure to avoid petroleum-based ingredients. Some people report great success using Otter Wax on their roughout boots.
Apply a thin layer of balm or wax of your choice onto the entire surface of each boot. Go into every crevice, including the stitching.


NEXT: ⏰ ⚠️ WAIT ONE WHOLE WEEK. This will allow the oils and waxes to distribute and set.
DAY 14: Start the break-in process
Follow the usual protocol for breaking into a new pair of boots.

This is how these boots looked week after the completion of my re-conditioning protocol (and after I wore them to break in):


Outcomes
The color:
Despite heavy application of oils and waxes, the boots didn’t darken as much as I thought they would. In fact, I like the current color much better. It just looks… healthy?
They went from a generic brown to a rich milk chocolate brown that even looks mahogany in the right light.
The leather:
Supple. I wore these boots for about 2 days total, and the upper hugged my feet without much resistance. This pair is a pleasure to break in. Of course, there’s a couple of odd pressure points, but they don’t bother me.
The fit:
I hate to admit it, but these ancient utilitarian boots have no business to feel this comfortable. They fit me better than my pair of Grant Stone Field Boots. (No shade at Grant Stone. I think I have the wrong last from them.)
I’m in-between sizes at ~EU 41.5 / 8.5 US and 7.5 UK. My feet are low-volume, and I have rather low in-step. Practically, this means that many boots in 41.5 are just too roomy for me, so I have to size down. (Except Wolverine 1000 Mile. These fit true to size.)
Both these Rangers and my Grant Stones are size 41, and the Rangers feel comfortably snug where Grant Stones feel excessively spacious even with extra insoles, thick socks, and tongue pads.
If you’re in-between sizes and have low volume feet (for your size), I recommend sizing down.
In conclusion
I’m super happy how this re-conditioning experiment turned out, which is why I decided to post this guide.
Hope it’s useful :)
About Kōbō Mono
Kōbō Mono is a blog about quality boots and shoes.
It’s currently run by one person: me. (Talking about myself in a third person has never felt more odd.)
It’s a place to connect with the fellow footwear enthusiasts, share what I work on, and build a community.
If you like what you read here, please consider subscribing or sharing this post with friends. Your help will go a long way 🙏
And since we’re at it, I want you to know that my long-term dream is to start a shoe company. We’ll see how that goes.
You can read more in the About section here: https://kobomono.substack.com/about