
#07 | BEFORE / AFTER: Thrifted Wolverine 1000 Mile boots
How I restored a pair of heavily creased old boots and gave them new life with a custom dye job
This post was originally published on Reddit where it gained good traction. I’m reposting it here with edits to expand on the techniques I used.
I a while back I thrifted a pair of Wolverine 1000 Mile boots for $16 CAD. Even though the sole and the upper were severely deformed, the leather was in a fairly good condition.
(This actually made me think just how much better the vegetable-tanned leather from Horween is when compared to more mass-market products.)


Inspection
After inspecting the boots, I found several problem areas.
First, they clearly survived some gnarly encounters which left them with several deep gashes. While they did a fantastic job protecting the previous owner, this was a problem for me, and I needed to figure out what to do without over-sanding the leather and thinning it too much.
Second, they had massive creasing which I wanted to minimize.
About creases: All leather creases are permanent. You can’t remove them, but you can minimize their appearance and help the leather crease to fit your gait, thus concealing the original creases and making them blend with the creases you’d have naturally.
Thus, my first order of business, though, was to whip them back into shape (quite literally).
Cleaning + Fixing deep creases
I started by giving them a bath using Dawn dish soap. This might raise some eyebrows, because the standard protocol is to use saddle soap or glycerin soap.
However, I was planing on making a custom patina. Because of that, the subtle conditioning effect of saddle soap would've worked against me: I prefer the leather as dry as possible before applying the dye as it helps to set the color
After washing and saturating the leather with water, I inserted heavy-duty lasted shoe trees, hoping that this would help to minimize heavy creasing. Fast forward 2 days of drying, and these deformed monstrosities started to look like boots.
Unfortunately, I don’t have a photo from this step of the process. 🫠
Reducing small creases
Now it was the time to fix smaller creases. I steamed the leather by covering creases with a wet cloth and pressing a hot iron against them, thus forcing the leather to hug the shoe tree and molding it around the form.
I then used a heat gun and a bamboo spoon to get rid of the remaining creases. Most were gone after another day of drying.
And although they would re-appear later with wear, those creases would be closer to what I’d naturally develop.
A note on conditioning
I never condition leather before painting the shoes, because leather conditioners prevent leather from absorbing the dye.
However, if your goal is simple restoration, you can stop reading here and head straight to my re-conditioning guide:

Fixing gashes and cuts
Dealing with the gashes proved trickier. There were three kinds of them: superficial scratches, small cuts in high-stress areas, and a deep cut in a low-stress ankle area.
I chose to sand off superficial cuts by progressively working them off with 400, 600, and 800 grit sandpaper.
The right boot had a long, deep gash around the ankle. Since this area normally doesn't face as much mechanical stress as other parts of the boot, I filled it with Angelus leather filler because it's flexible and absorbs the dye well. (I actually made a mistake here, and you can read about it at the end of the post.)
I decided to do nothing about cuts in high stress areas. They weren't deep enough to impact the boots structurally, and I simply accepted them as a normal part of wear and tear.
Once the gashes were dealt with, I stripped the shoes with acetone.

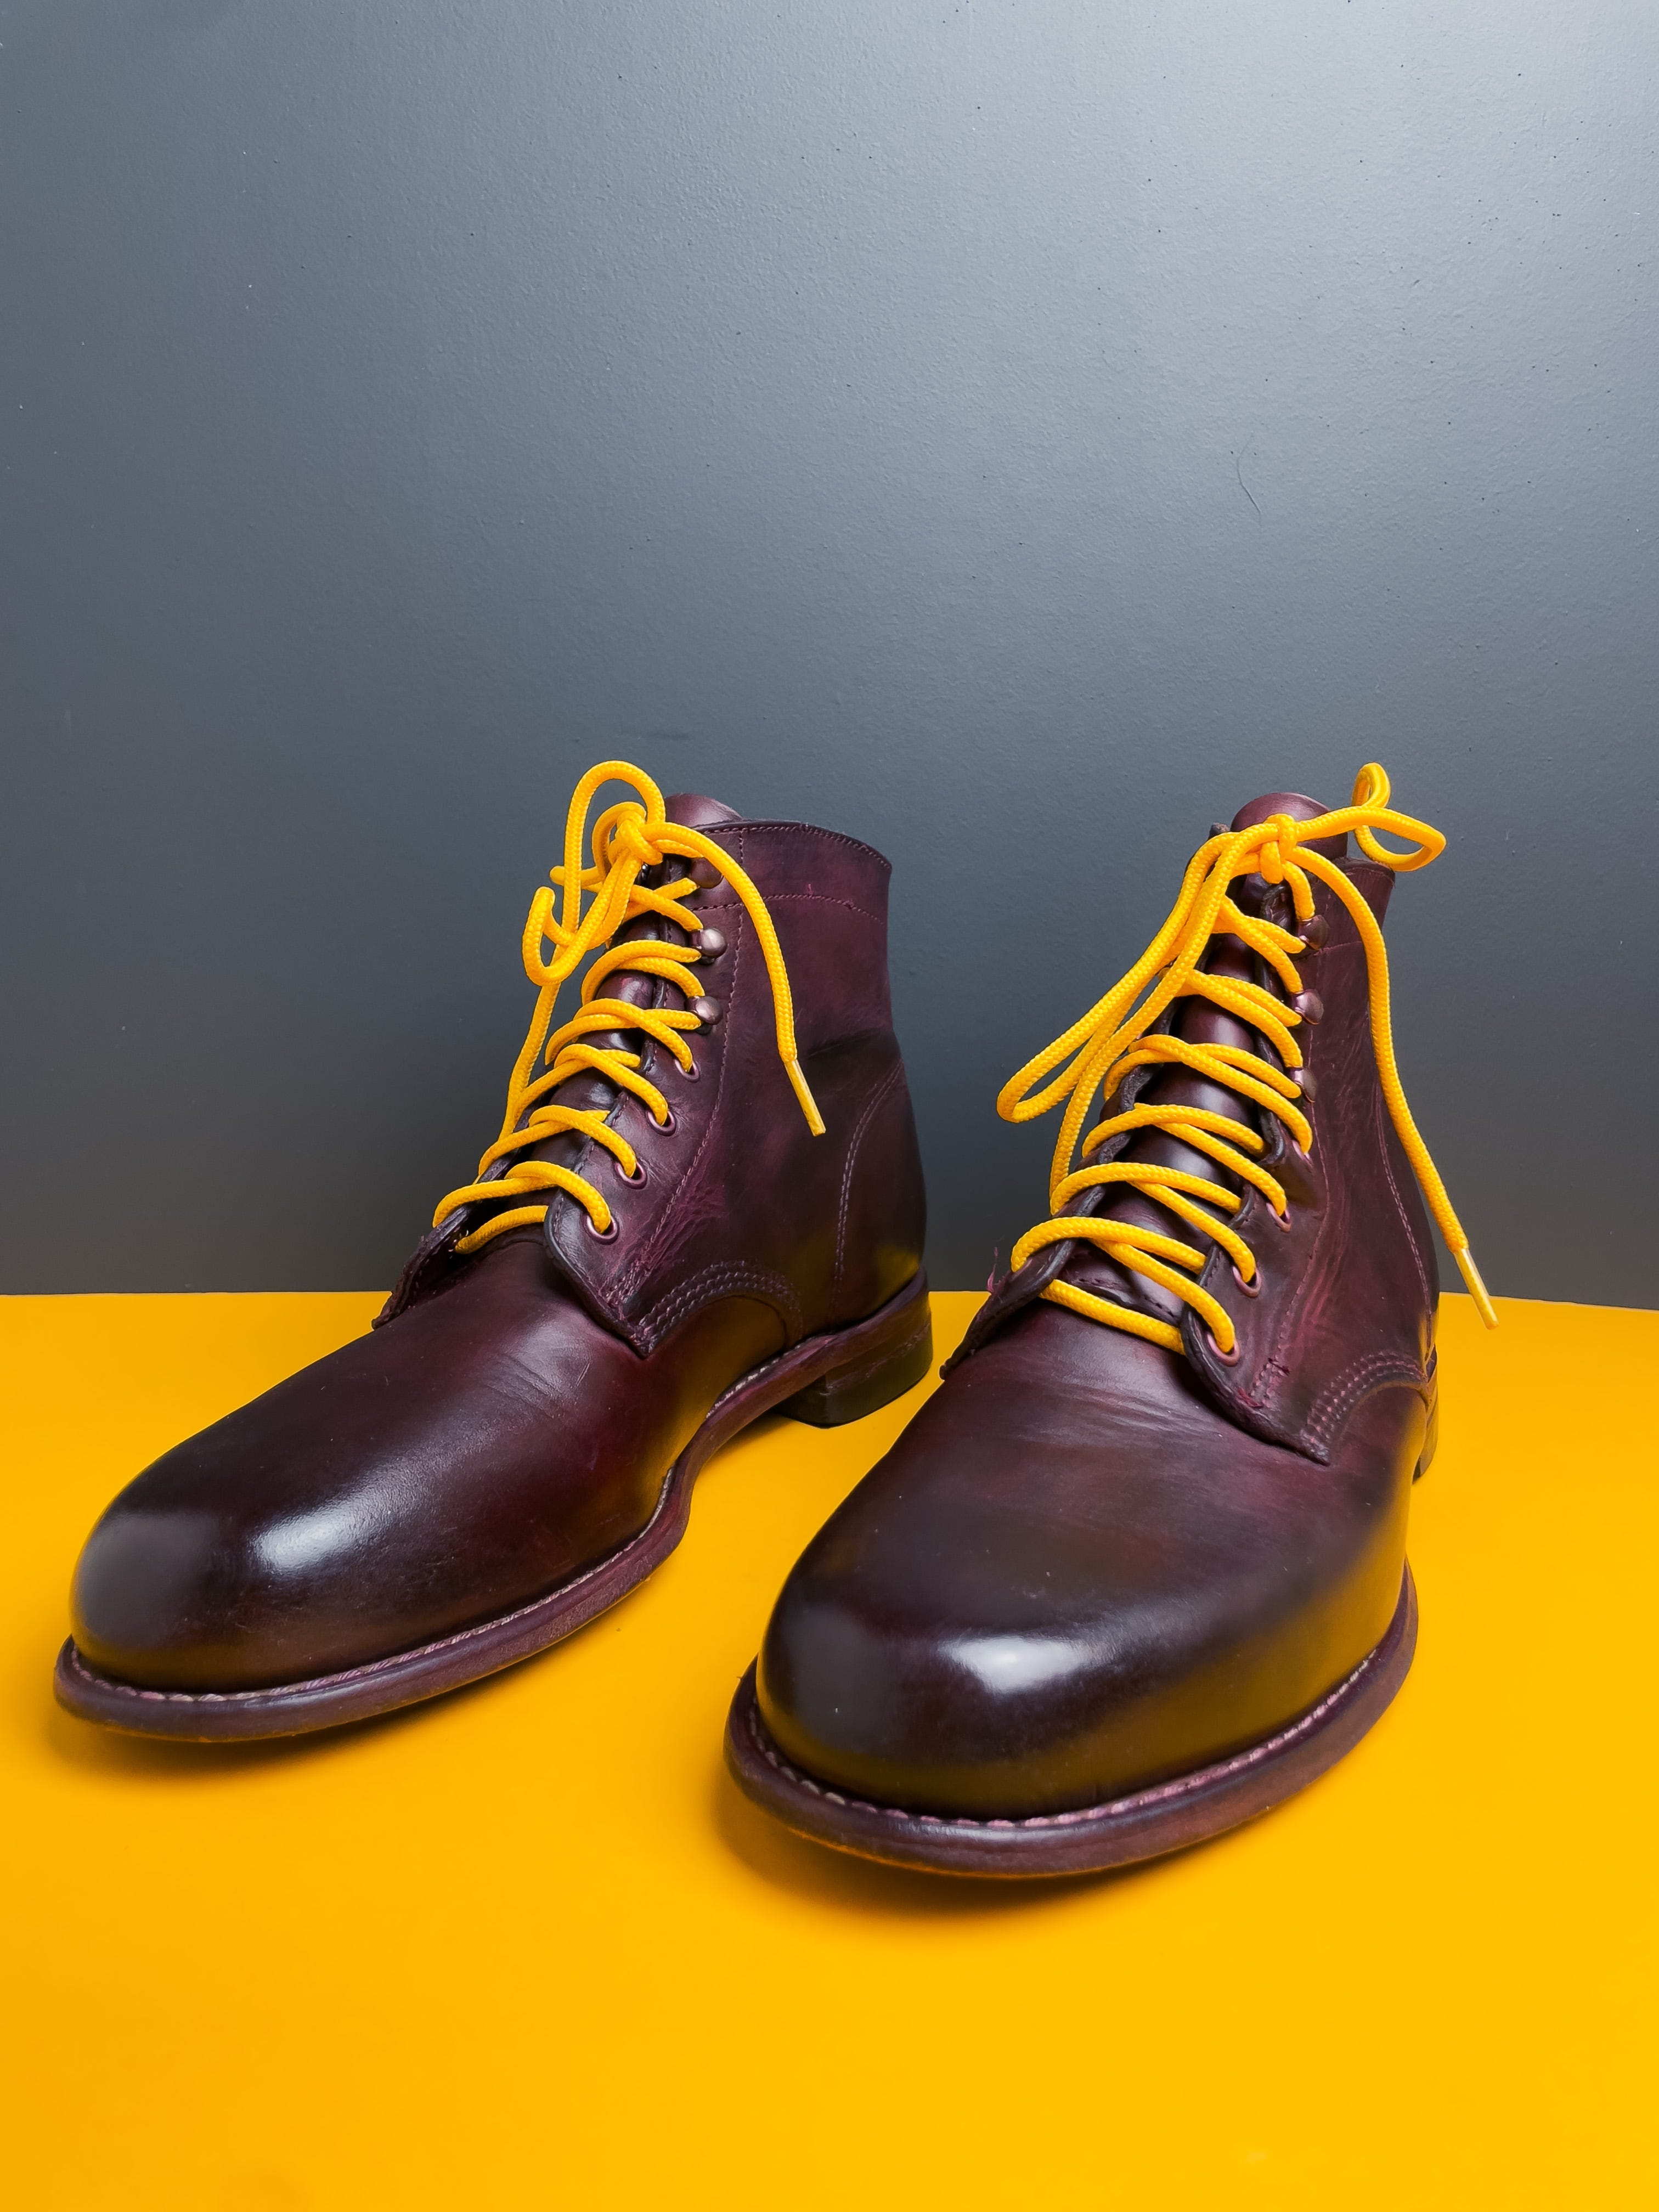
Custom patina
Dyeing the shoes did not turn out as expected. At first, I wanted to go for a “museum leather” effect with prominent marbling. To do that, I applied a coat of diluted red dye as my base color.

I then made a mistake and followed up with a more concentrated oxblood dye, which immediately darkened the boots.
My only option after that was mixing some burgundy by combining red and purple, and using that to get at least some marbling going.
Once that was done, I applied heavily diluted jet black pigment to accentuate the toe box, the heel, and other parts of the vamp where the shoe would normally get darker with wear.
And even though the result wasn’t what exactly as I planned, I was rather happy with how it turned out.
The mistake with Angelus filler
Stupidly, I applied leather filler as is. Instead, I should’ve mixed it with the dye to match my target base color.
Once I applied red dye right over the fixed gash, the white leather filler turned into a bright neon-red streak.
Luckily, I managed to conceal it by covering it with multiple layers of oxblood and burnishing, but the gash was still noticeable if you know where to look.
Final look before resole
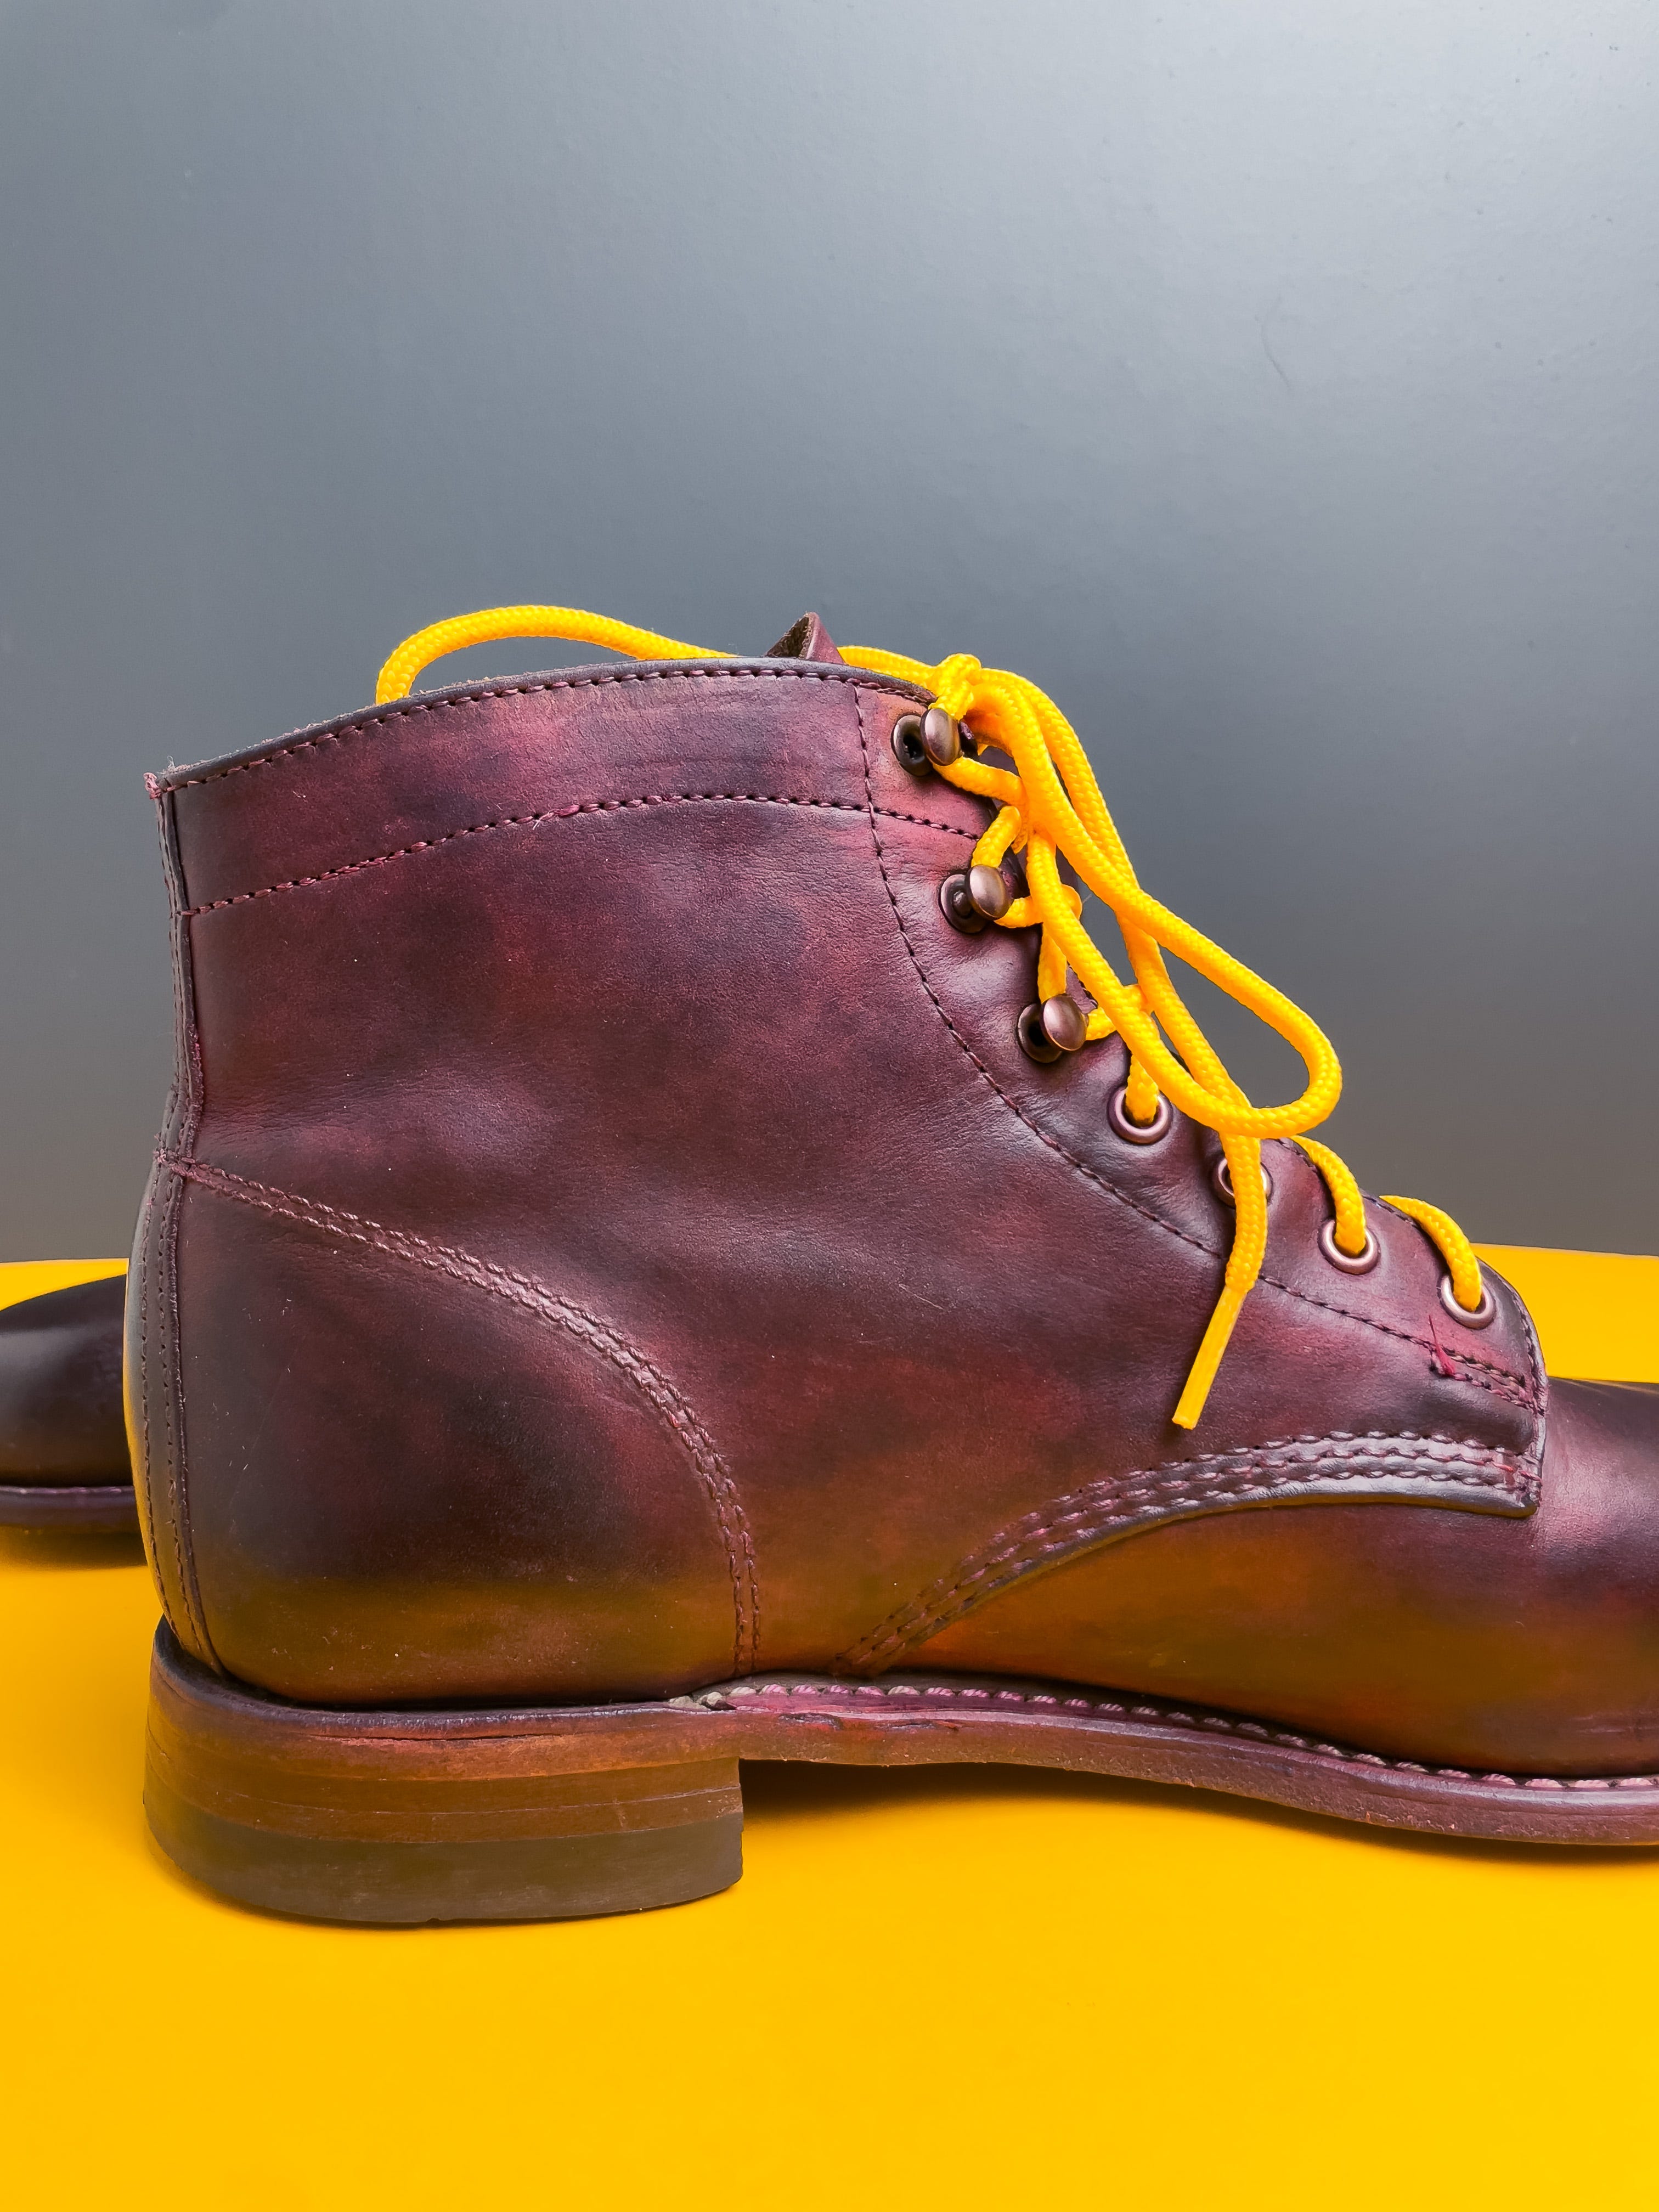
After 6 months of wear
(I’m still traveling, so I don’t have any recent photos on me. Promise to add them to this section once I’m back in Barcelona.)
I wore these boots consistently for 6 months since getting them re-soled, and the patina changed a lot during that time. First, it became lighter, then darker.
That was unusual, but I think this happened because this pair is made from a pull-up leather, which is basically a leather that’s stuffed with oils and waxes.
As the oils interacted with dye, they forced to re-distribute in an interesting way, giving my boots an even more distinct, museum-like effect.
A lot of dye has also pooled in the creases, which looks kind of cool.
About Kobo Mono
Kōbō Mono is a blog about quality boots and shoes.
It’s a place to connect with the fellow footwear enthusiasts, share what I work on, and build a community.
If you like what you read here, please consider subscribing or sharing this post with friends. Your help will go a long way 🙏
And since we’re at it, I want you to know that my long-term dream is to start a shoe company. We’ll see how that goes.
You can read more in the About section here: https://kobomono.substack.com/about